Sunday, March 24, 2013

Easy DIY flannel swaddle blanket

I had bought some snuggle flannel material at JoAnn's for my burp cloths and thought it would be fun to make a matching swaddle blanket.  This was a super easy project for any novice sewer.  Here are some pictures of the end result. 


The blanket ended up being about 36"x36" in size.  One side is the polka dot pattern and the other is a solid pink.  Overall, I think this turned out pretty good.  I was trying to make a square shape, as some other mom blogs have recommended square swaddling blankets rather than rectangle.  I noticed my edges aren't perfect and my square is a bit questionable, but live and learn, right?! 

Another thing I'm not quite sure on with this blanket is whether the blanket will stay formed once it's washed, or if I should be adding some stitches in the middle or something.  Anyone else out there have experience with that?  I'm only hoping to get better in this endeavor to make baby gifts, so wish me luck on the next one:)

Saturday, March 23, 2013

Easy DIY baby blanket

This weekend I worked on a baby blanket for a friend of mine who is having a baby boy early summer.  Since I already have some burp cloths to give her, I thought it would be fun to try a new project and attempt a blanket.  I found this posting of a woman who made this blanket, and thought it sounded simple enough that even I could do it! 

I found the fabric at JoAnn's and bought a yard of cotton fabric and a yard of the soft blue fabric.  I washed both before beginning the sewing project.  The cotton fabric needed to be ironed, but the blue did not.  Once the fabric was ready, here are the 3 easy steps to assemble (probably takes 20-30 minutes):
1) lay fabrics on top of each other - wrong side together
2) fold over edges and pin
3) sew around

This is a very quick tutorial, and I didn't take pictures as I went, so I'll be sure to take better step-by-step pictures next time around.  Here is the end result!


I can't wait to give this blanket away and see my friend's bundle of joy wrapped up in it when he comes!

UPDATE:  Here is another blanket that I made!

Tuesday, March 12, 2013

Our wedding - centerpieces

Once the bouquet for our wedding was determined (see bouquet post here), we continued on with planning the centerpieces.  I was very blessed to have the advice and expertise of my friend Kristie who is so very talented when it comes to event planning and visualizing what a space could look like.  We got together a few times and I showed her some decor ideas I had pinned on pinterest as inspiration.  My "wedding board" showed us that we were looking for a rustic, yet elegant style.  So, we got to work on creating centerpieces.  We wanted to come up with 3 centerpiece styles.  Using my pins as well as taking an inventory of items we had on hand to use, the centerpieces evolved into this:

1)  Hurricane vase with candle inside and 4 hanging candles around the outside.  Dried hydrangeas and real flowers (same flowers from my bouquet) were placed in an oasis around the bottom of the hurricane vase.  Grape vines were twisted around the hurricane vase.


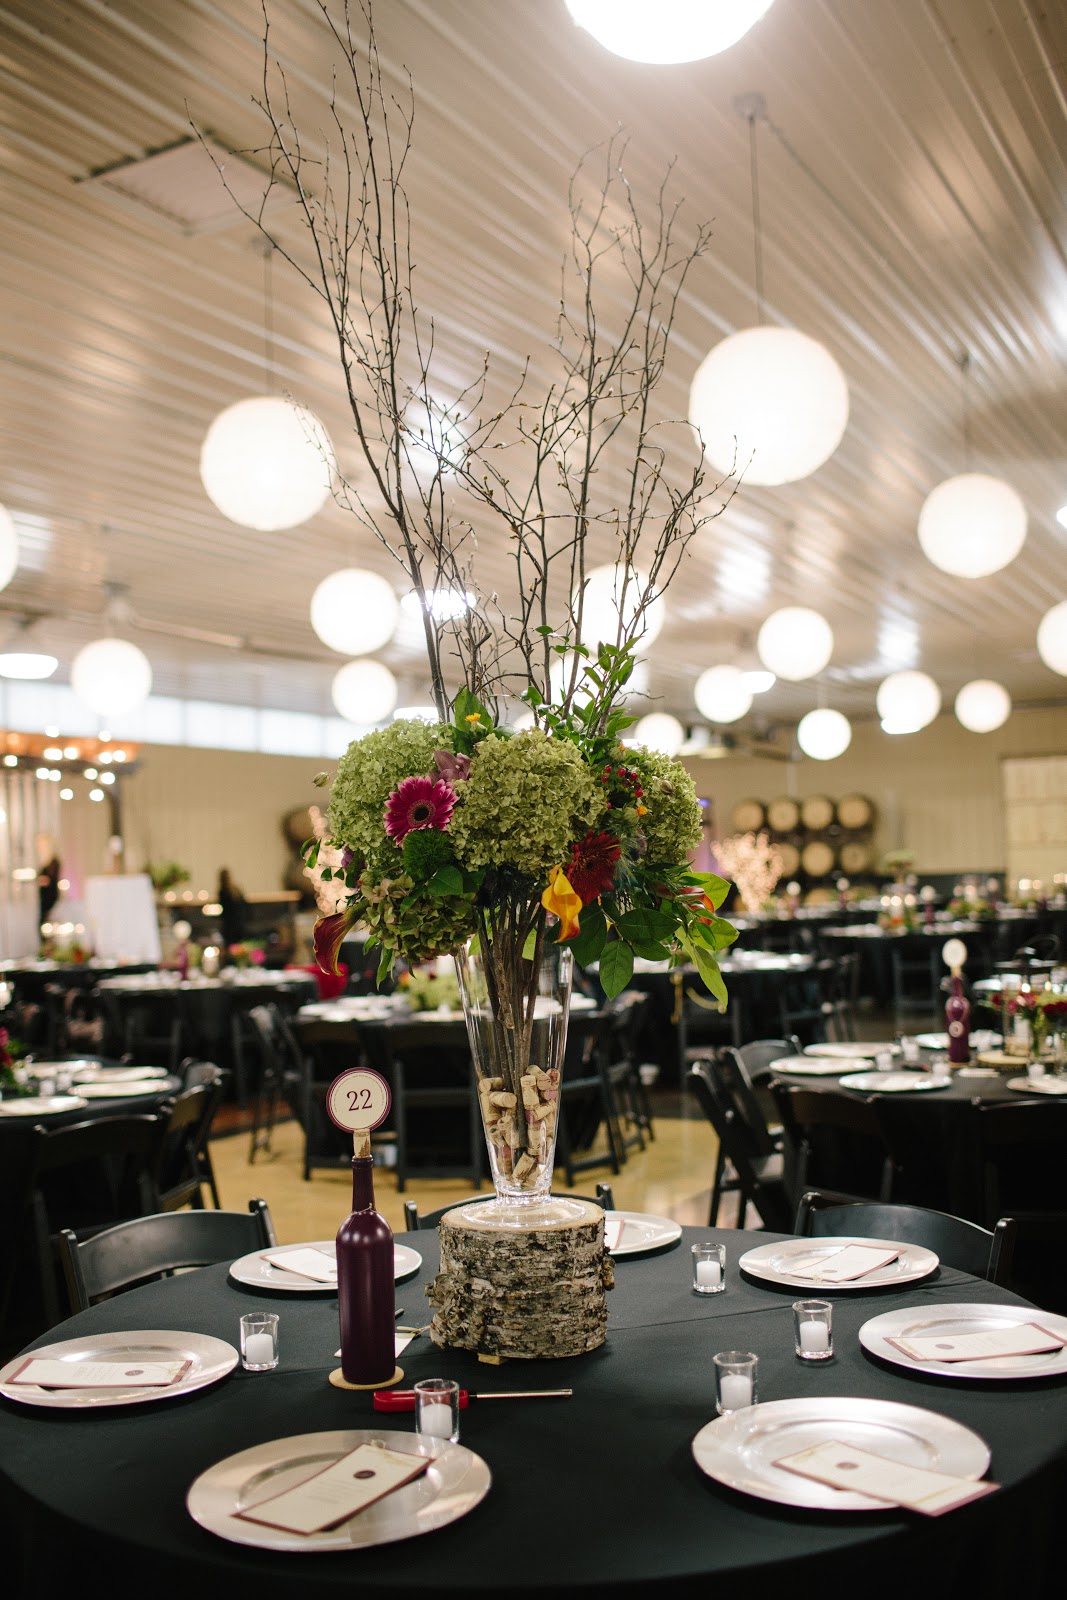
2)  Tall vase with birch branches coming out the top surrounded by dried hydrangeas and flowers from my bouquet.  The vase was displayed on a piece of birch and filled with corks from the winery.


3) Lantern on wood slab with candle in it.  Flower displays with the same dried hydrangeas and flowers from my bouquet.


Each table had a wine bottle with our monogram tied around it and the table number in the cork.  It's hard to see, but we also included one of our bible verses around the outside rim of the table number, "I am the vine, you are the branches....apart from me you can do nothing." -John 15:5

A good high school friend helped me design our invitations, programs, place cards, and the table numbers.  I'll post more on that later.  The tables were set with silver chargers and topped with our wedding program.  Since our wedding ceremony was in the same room as our reception, we thought it would be just as easy to have the programs at the table spots already.


So that's our centerpieces!  I'll post more on other decorations!

Monday, March 11, 2013

Our wedding - bouquets

We finally got our wedding pictures back from our photographer and I am so excited to start sharing them with you all!  Our wedding was held at Carlos Creek Winery in Alexandria, MN.  Check out their website here: http://www.carloscreekwinery.com/

The venue itself is beautiful and has a very rustic yet classy feel to it.  When I got engaged, the only thing I really knew that I wanted was a bouquet that I had seen on pinterest.  That bouquet inspired everything else!  This is the bouquet that I had - I absolutely loved it.  It was filled with so many beautiful, bright-colored flowers which was great for a November wedding when in Minnesota the outside colors are pretty dull. Here is my bouquet:

Here's a bridesmaid bouquet - same flowers, just a bit smaller.
Aren't they pretty?!

This is the bouquet that started it all - more wedding pictures and decor to come! 

Sunday, March 10, 2013

Faith, Hope, Love - DIY wall art

There is a small wall before entering the guest bathroom and it seemed a little blah to me.  I finally finished a project that is the perfect size for the space!  And now every time we walk past it, we'll be reminded of 1 Corinthians 13:13 - "And now these three remain: faith, hope and love. But the greatest of these is love."


I got the frame at goodwill and painted it white.  I had some burlap on hand from and wrapped and hot glued the brown burlap around the cardboard in the frame.  I was at JoAnn Fabrics and they happened to have some wood words on sale for $0.49 each, so I snagged that deal and painted the words white.  The flower at the bottom is made out of a strip of white burlap that I formed into a flower and hot glued together.


Overall, I think it turned out pretty well!  And it sure spruces up the previously empty wall!

Monday, March 4, 2013

Ski Trip

Last week, hubby and I enjoyed an extended weekend getaway to Steamboat Springs, CO, for some mountain skiing!  Since the winter is his crazy busy time at work, we haven't been able to spend much quality time together, so this getaway was the perfect trip between his work deadlines.  Here are a few pictures of our weekend!
 Lots of snow while we were there!


 Making some of the first tracks on the freshly groomed run!


We visited Strawberry Park Hot Springs after our last day of skiing.  This is a natural hot spring that flows into a couple of different pools, all built around it and has a very natural feel.  It's up in mountains outside of town and the perfect way to spend the late afternoon to give our bodies some relief from a couple of intense skiing days!